Team:Waterloo/Software
Software
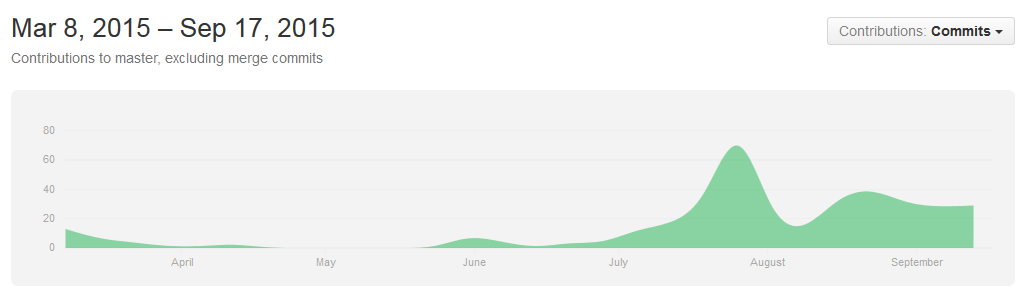
Software played an important role in CRISPieR project, since mathematical and computational modelling is a major area of interest for Waterloo iGEM. The team maintained a GitHub organization throughout 2015- our nearly 600 commit messages and more than 100 pull requests can be browsed at your convenience.
Summary of uwaterloo-igem-2015/models
- targeting: Python code from CRISPR/Cas9 model, run genome_simulation.py to see results for a single genome, genome_multisimulation.py gives averaged results for many simulaitons
- tridimensional: various bash and Python/PyRosetta scripts for rational design of cas9 mutants with engineered PAM specificity, see notes below
- viralassembly: MATLAB code for the CaMV Replication model, run viralAssemblyTimeSeries.m to see time series plots
- viralspread: NetLogo code for the viral spread model, run ViralSpreadFullODE.nlogo to see results incorporating Euler's method approximation of viral spread ODE
PyRosetta and PyMOL
We used PyRosetta and PyMOL quite extensively when modelling engineered PAM specificity. The documentation for PyRosetta is rather sparse and we have often encountered our hastily-written GitHub wiki pages on the software rather distressingly near the top of Google results.
The sections below, in addition to our scripts and the PAM Flexibility page, provide some documentation for other iGEM teams looking to model protein binding with PyRosetta.
Setup Instructions
PyRosetta
Adapted from this guide.
PyRosetta is fairly simple to install on Windows, assuming Python is installed. However, it does take large amounts of RAM (you'll need a computer with >4GB), so you may need to use the Linux version for older computers.
- Download Python 2.7. You MUST use the 64-bit version, and make sure to select the option to add python to your path.
- Install iPython. Open a command prompt, and type
python -m pip install ipython. This should download and install ipython in one step. - Get pyreadline (Download the 64-bit version, pyreadline-2.0.win-amd64.exe). Run the exe once download is complete. This provides a bunch of tab-completion and other handy features, it isn't necessary, but is very helpful.
- Get a PyRosetta license. These are free for academic/non-commercial use.
- Once your license is processed (which should only take a couple minutes), you'll receive an email with a username and password, and a link to the download.
- Download the most recent version of the PyRosetta windows. You'll want the .exe for the latest release.
- When the download completes, run the exe to install PyRosetta.
- Two shortcuts should appear on the desktop, one for "iPython PyRosetta shell" and on for "PyMOL PyRosetta Link". Delete the second one, as it doesn't work with the version of PyMOL we'll be using.
- Open the ipython shell using the remaining shortcut. type:
from rosetta import * rosetta.init() - If you get a message ending with something like the following, you've successfully installed PyRosetta.
core.init.random: RandomGenerator:init: Normal mode, seed=-1088387864 RG_type=mt19937
PyMOL
Adapted from this guide
- Create a folder (e.g. C:\PyMOL_Install) to hold the files>
- Download:
- pymol-1.7.6.0-cp27-none-win_amd64.whl
- pymol_launcher-1.0-cp27-none-win_amd64.whl
- numpy-1.9.2+mkl-cp27-none-win_amd64.whl
- Pmw-2.0.0-py2-none-any.whl
- Move the files to the folder you created.
- Start a command prompt, and move to the directory you saved the files in:
cd C:\PyMOL_Install - Assuming you added python to you path earlier, run the command:
python -m pip install --no-index --find-link="%CD%" --pre pymol_launcher-1.0-cp27-none-win_amd64.whl- If there are errors, try installing the .whl files in this order: numpy, Pmw, pymol-1.7.6.0, pymol_launcher
- If there are no errors, you should be able start PyMOL using C:\Python27\PyMOL.exe
- Create a shortcut on your desktop to make starting PyMOL easier.
Linking PyMOL and PyRosetta
Adapted from this guide.
- Start PyMOL
- In the command line (upper window), type
run C:\Program Files\PyRosetta\PyMOLPyRosettaServer.py - You should see a message just above saying:
If it doesn't work, check if PyRosetta installed to the above path (which it should have if you followed the instructions on this page). If the path is different, modify the run command to match.PyMOL <---> PyRosetta link started! at 127.0.0.1 port 65000 - Go to the 'File' menu and select 'Edit pymolrc'.
- Add the same run command to the file, then save it. This will start the PyRosetta link automatically every time you run PyMOL.
PyRosetta
For Mac OSX (vanilla)
Adapted from this guide and this guide.
- A license must be obtained prior to installation, to obtain an academic license (it's free by the way) please visit this site to get one.
- After obtaining a license, go back to the download page and choose the PyRosetta monolith release for Mac. (NOTE: Do not use the download link provided in the license email for Linux and Mac installations! It does not include links to the latest version of PyRosetta.
- Create a new directory (new folder) in the space you'd like to install it (I would personally recommend creating a workspace directory and then un-tarring the pyrosetta.tar.bz2 in workspace, so the path to the .tar.bz2 file would be
users/'YOURUSERNAME'/workspace/PyRosetta.monolith.mac.release-55.tar.bz2 - In the terminal type in
to un-tar the file, or alternatively just click on it to decompress it.tar -vjxf PyRosetta-monolith.mac.release-55.tar.bz2 - Since Mac already comes with Python 2.7, python does not have to be installed. Open a terminal window and paste in
to move to the PyRosetta directory.cd ~/workspace/PyRosetta.monolith.mac.release-55 - Once you're in the directory, start python by typing
in the terminal, and import the PyRosetta library with the following commands:pythonimport rosetta rosetta.init() - If no errors or complaints have been made by your machine, congratulations, you have just installed software that is notoriously difficult to install!
PyRosetta for Mac OSX with a Package Manager (e.g. Homebrew)
Unfortunately, for Mac users that use either homebrew, fink, or macports, PyRosetta must be built from source, since custom versions of python are used when one of the above are installed. If you don't know what homebrew, fink, or macports is, you probably don't have it installed so use the instructions above.
- Obtain an academic Rosetta License from here.
- Once you have a license and have been prompted to the download page, download the latest source version of Rosetta. At the moment it is Rosetta 2015.19.
- After downloading the .tgz and un-tarring rosetta into the directory of your choice, go into the directory where rosetta is in and find
building.txt
located in the following path
which contains specific instructions to build and deploy pyrosetta.main/source/src/python/bindings/
PyMOL
PyRosetta
Please ensure you're running at 64-bit version of Ubuntu or your preferred Linux flavour, as PyRosetta is available in 64-bit only.
- Installing iPython first is useful, as it allows much easier interaction with PyRosetta:
sudo apt-get install ipython - Download the latest release.namespace build for Ubuntu (you will have to sign up for a free academic license).
- Place the file where you want to use it (Note: Somewhere convenient to access, such as the your home folder, is recommened since you will be running files from this folder each time to use PyRosetta/PyRosetta+PyMOL).
- In terminal, navigate to the folder above, and use
to extract the file.tar -vjxf PyRosetta-.tar.bz2 - Run the script which sets up your environment by typing
while in the PyRosetta folder. This must be done each time you want to use Rosetta.source SetPyRosettaEnvironment.sh - Open IPython (ipython) and try running PyRosetta to see that it set up properly:
.import rosetta rosetta.init()
PyMOL
Run this command in terminal:
sudo apt-get install pymolThis will install the version of PyMOL which is hosted on Ubuntu's package directory. This is not the newest version, but it's reasonably up-to-date, and this method has the added bonus of automatically installing all dependencies that are need for PyMOL.
This guide was developed following instructions from the PyRosetta online documentation. All installs are local to the user.
It is recommended to use the default binaries provided by PyRosetta. However, the following scenarios are reasons for installing PyRosetta from source:
- You need to have bindings for your own custom C++ code that is not part of Rosetta master branch
- PyRosetta needs to run custom-build Python (for example if you would like to use some Python packages from MacPorts, Fink or Homebrew who deploy its own version of Python)
- You need to use a different version of Python
- You can't install GLIBC required by pre-build binaries
- You are running on a 32Bit system
Deploying PyRosetta Build Environment
Dependencies
Rosetta SourceDownload the Academic Version of Rosetta software, and extract the archive
tar xvzf rosetta_bin_linux_####.##.#####_bundle.tgz ~/rosetta_bin_linuxTo easily install all of the following dependencies, run the following:
cd rosetta_bin_linux/
cd tools/PyRosetta.develop/
./DeployPyRosetta.py
This should take some time. If at the end everything installs correctly, skip to Building PyRosetta. Otherwise, keep reading the following subsections.
PythonInstall Python >= 2.5. Most systems come with this installed, but if not, it's available here
CMakeLike Python, most systems have this installed by default. Install Cmake from here if not.
./bootstrap --prefix=~/Applications/
make
make installmkdir gccxml-cvs
cd gccxml-cvs
cvs -d :pserver:anoncvs@www.gccxml.org:/cvsroot/GCC_XML co -D 2009-04-15 gccxml
mkdir gccxml-build
cd gccxml-build
cmake ../gccxml -DCMAKE_INSTALL_PREFIX:PATH=~/Applications/
make && make installDownload PyGCCXML and Py++ archives from SourceForge, and extract the zip file.
unzip pygccxml-1.0.0.zip
cd pygccxml-1.0.0
python setup.py install --user
cd ..
unzip Py++-1.0.0.zip
cd Py++-1.0.0
python setup.py install --user
Check that all of the above are installed correctly
python
>>> import pygccxml, pyplusplus
>>> print pygccxml.__version__, pyplusplus.__version__
If installed correctly, the output is
1.0.0 1.0.0Install Boost (download from here or here). Most Linux distributions will come with boost. If so, skip to the next step. If not, run the following commands
tar xvzf boost_1_58_0.tar.gz
cd boost_1_58_0/
./bootstrap.sh --prefix=/home//Applications/
./b2 install --prefix=/home//Applications/
In the bootstrap command, the prefix must be an absolute path.
Building RosettaTest the installation by navigating to ~/rosetta_bin_linux/main/source/src/python/bindings/ and running
./BuildBindings.py -I ~/Applications/include -L ~/Applications/lib -L ~/./local/lib(This takes a very long time, there are lots of files to build)
Building PyRosettaAfter successfully deploying the PyRosetta build environment, copy the generated BuildPyRosetta.sh into the main Rosetta source directory:
/rosetta/main/source/BuildPyRosetta.shRecommended Directory Structure
The scripts developed by the Waterloo iGEM team were developed using the following directory structure. Setting up a similar structure should allow you to use the same the scripts on different computers, making development significantly easier.
- In the same directory as the PyRosetta folder, create another folder called working.
- Within the working directory create folders pdb/, results/, and scripts/
- Create subdirectories results/batch/, and results/batch/log/
- Download the files in the models/tridimensional/docking_validation folder on the Waterloo iGEM 2015 github into the working/scripts directory.
Getting Started with Cas9-DNA docking
The batch_dock.sh script found here is designed to perform docking of cas9/dsDNA pdb files with different 3 and 4 nucleotide pams. The script includes basic usage documentation for performing a docking run. If you have any questions regarding scrip usage, please contact the Waterloo iGEM team.
Restriction Digest Calculator
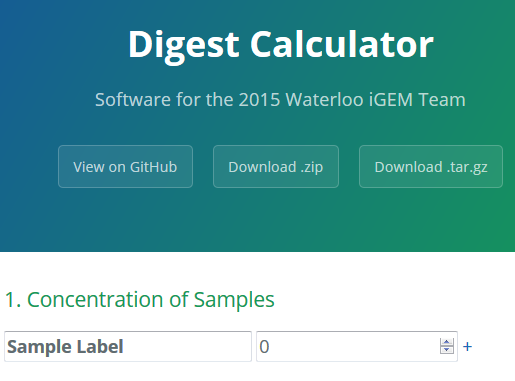
The team often makes very repetitive calculations when doing restriction digests. One of the lab team members ended up creating an online spreadsheet to assist with the calculations and the modelling team decided to convert it into an online tool for others to use.
The Digest Calculator made available on our website allows iGEM teams to easily and automatically find the volumes needed for their restriction digests.