Difference between revisions of "Team:DTU-Denmark/Software"
| Line 101: | Line 101: | ||
data-toggle="dropdown" | data-toggle="dropdown" | ||
role="button" | role="button" | ||
| − | aria-expanded="false">Project | + | aria-expanded="false">Project |
<span class="caret"></span></a><ul class="dropdown-menu" role="menu"> | <span class="caret"></span></a><ul class="dropdown-menu" role="menu"> | ||
<li > | <li > | ||
| − | <a href=" | + | <a href="" |
| − | > | + | >None |
</a></li> | </a></li> | ||
<li > | <li > | ||
Revision as of 03:18, 19 September 2015
The Wiki Wizard
Creating and designing an iGEM wiki can be a difficult and time consuming task. We believe that many teams would benefit from an easier way to create and design, which led us to develop the Wiki Wizard.
The Wiki Wizard is a content management system (CMS) that allows the user to create and edit pages easily. It includes functions such as: namespacing pages and files, referene list for a page, and a preview of the wiki that can be seen by clicking on the ’Team main page’ link in the menu. Most importantly, the Wiki Wizard allows user to create wiki that are in compliance with the wiki standards specified by iGEM.
You can find it at GitHub
Wiki creation
With our wiki wizard, you can choose an existing theme, upload a theme made by someone else, or create your own. The tool is based on Flask and it uses the Jinja engine for loading of templates. By default, the Wiki Wizard uses a bootstrap theme and creates pages corresponding to the standard IGEM pages.
Content
Page
In the Wiki Wizard, a page is a container for one or more sections in which the page content is written. A page can also be assigned an image, template, position, name, and url.
- The template determines the overall layout of the page.
- The image is a setting that themes can use for page specific images.
- Position determines the order of pages in the menu unless the menu is specified in menu (see below).
- The name is shown in the menu, and
- The URL is the link to the page – e.g. blank for front page, or "Team" for the team page.
Section
Sections are where the content is stored. These can be edited either in the page editor or separately in the section editor. To make writing easier, the section content is written in a CKEDITOR frame, which allows you to write HTML as you would write a page in Word. This allows user without knowledge of HTML and CSS to generate appealing content. Sections, like pages, can be assigned an image, template, position, and name.
- The image is a setting that themes can use for section specific images.
- The template determines which and how the content is rendered.
- The position determines the order of the sections on a page, and
- The name is used for section headers. Themes can use the name to create links to sections.
Entities
Besides keeping track of your pages, the Wiki Wizard can also store your teams members, advisors, sponsors etc as Entities. Section templates can be designed to show (some of) these, thus adding members to your members section can be done with a few clicks. Again these can be edited in a CKEDITOR frame (see above) and have some settings. They are, image, position name, role and link.
Besides keeping track of your pages, the Wiki Wizard can also store your teams members, advisors, sponsors, and etc, as "Entities". Section templates can be designed to show (some of) these, thus adding members to your members section can be done with a few clicks. The entities can be edited in a CKEDITOR frame (see above) and they are associated with some settings. Thesettings are: image, position name, role, and link.
- Images are used to for e.g. member section images.
- Position determines the order of entities.
- Role is used to filter entities; e.g. By splitting up members in team membrrs and advisors.
- Name is the name of the entity.
- Link can be used to make links to e.g. sponsor websites.
Menu
The menu can be used to create a nested menu or add external links to the menu. Each item in the menu can have page, parent, position, name url, and children.
- Page is used to make a link to a page.
- Position determines order.
- Name and url can be used to make external links. These are ignored if page is assigned. Parent/Children can be used to create dropdowns. Items associated witt a parent, will be listed under the parent, and children are the items listed under the current item. The number of levels of the menu may be limited by the selected theme.
Timeline
Timeline entries can be used to quickly generate a timeline/journal. These entries have a date, title, and content, which can be edited with a CKEDITOR. The timeline can be inserted in a specific section by selecting a template that shows timeline entries.
References
Keeping track of reference order is tedious, bit with the Wiki Wizard, references are ordered automatically. They should have the reference text, and a reference id.
- The "id" is used to insert citations in the content. Similar to LaTeX, they can be inserted witth[-1].
- "Reference text" is the text that will be shown in the reference list.
These settings can be grabbed automatically by supplying a doi for the reference. The references Will be displayed, when a reference section is added to the page. The default themes include a reference section template.
Files
Files can be uploaded to the Wiki Wizard under "Files". The Wiki Wizard automatically rename files to the correct namespacing when uploading the files to the wiki (see below).
Settings
The settings tab can be used to select the base url that the wiki should upload to. This year, it is 2015.igem.org, next year it should be 2016.igem.org. This is also the page, where the team name should be entered, so that the Wizard can upload and rename files correctly. The last setting is used to determine whether or not, it should be possible for new users to register on the Wizard. This option should be ticked off, once the desired users have been created. Users can also be created and deleted under the Advanced > Users tab.
Theme
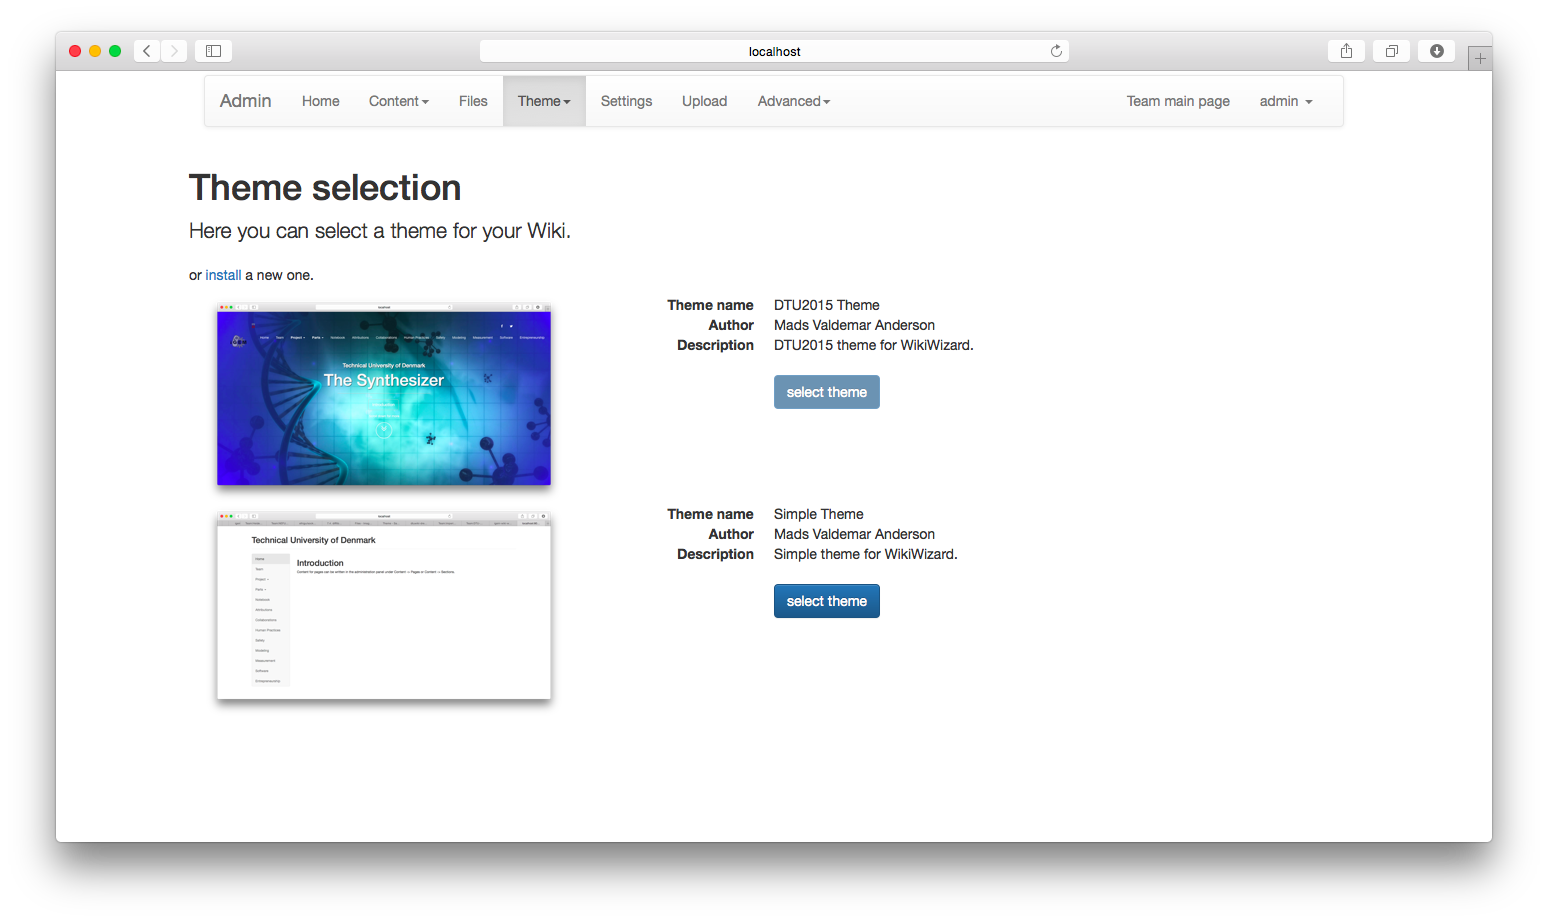
This section can be used to edit/upload files for the current theme under theme files. Themes can be selected under "Select Theme".
Wiki Upload
The Wiki Wizard can upload the files and content to the iGEM servers and automatically rename files to the correct namespace. The Wiki Wizard takes care of the upload using the user's login to iGEM.
Writing themes
The theme system utilises FlaskThemes2 for theme selection. Additional information on writing themes can be seen here.
Themes can be uploaded to the Wiki Wizard as a zip file containing the theme folder. Briefly described, the theme folder contains one file and two folders.
- info.json
- static
- templates
Theme templates are stored in the templates folder and static files are put in the static folder, these can be images, javascript, stylesheets, etc. The info.json stores information about the theme, such as author and a description.
Perspectives
We have several improvements in mind for the Wiki Wizard.
- We would like to add a graphical menu builder, that can be used to design the main menu using drag and drop.
- We would also like to improve on the collaboration feature and possibly use socketio to keep changes of the fields live.
- Replace the admin feature with inline editing to give a better feel of how the page will look.
NOD Nrps Oligo Designer
In order to fully utilise high throughput methods, you must be able to do high throughput design.
We developed a prototype oligo designer for NRPS library production and screening in python (NOD).
You can find it at GitHub
Usage
NOD is a commandline program, that takes a fasta file with one or more dna sequences encoding a NRPS and prints oligos that can be used to alter the specifity of each module. Also shipped with the tool is a simple UI, that can be run instead.
Requirements
NOD requires a few extra programs. It uses HMMSEARCH of HMMER to identify the adenylation domains and MUSCLE to identify the stachelhaus code, it is written in python and requires BioPython. To run the UI, wxPython must also be installed.
Development
The code for identification of adenylation domains and stachelhaus is based on antiSMASH, but has been slightly modified in order to not only identify the stachelhaus code, but also keep track on the positions in the unaligned sequence.
After identifying the stachelhaus residues, the stachelhaus code is compared to the stachelhaus code of different specificities. By comparing the degenerate sequence of the new stachelhaus code to the sequence of the native code, the changes are scored based on the amount of oligos required to incorporate all changes followed by the number of required mismatches. More than one oligo may be necessary, if changes are too far apart. The oligos are designed to be 90 nucleotides long with homologous ends of atleast 15 nucleotides in each end.
Perspectives
The developed tool is only a prototype and several improvements could be added.
- Currently the program randomly selects a codon from a degenerate codon if more than have the same required mismatches to incorporate. An improvement to this, could be to score codons according to codon usage.
- The oligo folding is not optimised, but this could be added by using ViennaRNA.
- With more data on incorporation efficiencies, it would be possible to calculate the allelic replacement of each oligo set, in order to select the stachelhaus code with highest allelic replacement
Department of Systems Biology
Søltofts Plads 221
2800 Kgs. Lyngby
Denmark
P: +45 45 25 25 25
M: dtu-igem-2015@googlegroups.com
