Team:TU Delft/Hardware


Hardware Title
Subtitle
Overview
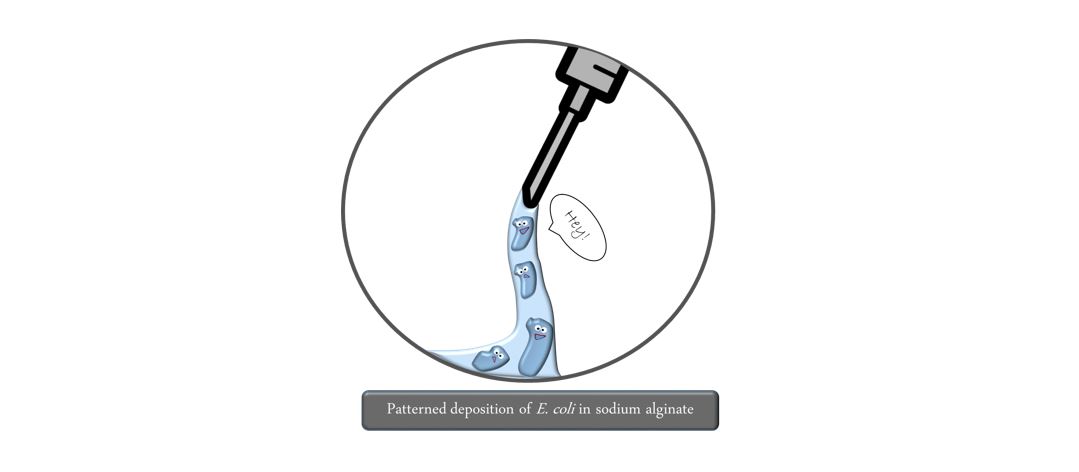
The Biolinker - a DIY biofilm printer
We built a functional prototype of a 3D printer, our Biolinker, from cheap DIY open source parts, which is capable of bioprinting bacteria in shapes based on lines and circles. The bioink is made out of our engineered bacterial cells, which we successfully immobilized into a gel. With this bioink we can print lines with a resolution (thickness) of down to 1 mm. We were able to successfully print and image of up to 4 layers of bioink with only little mixing between the layers. Although redissolving jellified alginate becomes more challenging with size, our bacterial cells were able to survive under alginate dissolving conditions for 24 hours.


Since the 1980s numerous applications and materials have been developed for 3D printing. Nowadays, starting from a computer generated three dimensional image file (stereolithography .STL) metals, plastics or even food can be printed in any shape imaginable. Recently, significant progress has been made in the three dimensional printing of mammalian stem cells towards creating artificial organs with many renowned research groups all around the world working on this. Since 3D bioprinting has high potential and is still largely unexplored, we set out to find a novel application. Inspired by machine-specific properties: precision and reproducibility, we came up with the idea to print cells in a structurally defined pattern. In this way we intend to meet the increasing demand of reliable product testing in medicine and health applications.
In the following pages, we describe the development and the printing conditions of our prototype.
Making 3D Biofilms
Biolinker: From 3D printer to a Biological System
Normal 3D printers generally follow the same principle: raw material is transferred into liquid state by melting, or utilization of a fine powder, to obtain high precision upon deposition of the material. At this point the material needs to form a stable, solid structure,by cooling it, or using UV light that chemically solidifies the compound.
Based on 3D printer general principles, we identified the following design requirements for the Biolinker:
- Liquid bioink
- Curing reaction to form a supporting scaffold
- Removable scaffold to obtain the final bacterial structure
- Cells need to survive every step of the entire process
- Sterile environment needs to be maintained at all time
From these points, we came up with a six step process to make a 3D biofilm!
How we print bacteria in 3D
Step 1: The first step already determines the outcome printing quality. The bioink needs to be deposited at the exact right spot to print a structure with high precision. Firstly, this depends on the precision of the motors moving the printhead across the stage. Secondly, it depends on the bioink itself. Its viscosity, flow rate and surface tension. Finally, the adhesive properties of the surface (in the following referred to as biopaper) upon which the material is deposited determine the outcome.

Step 2: By pretreating the biopaper with calcium chloride, the bioink is immediately exposed to free calcium ions upon deposition. This triggers the crosslinking of the alginate polymer to afford a stable gel. You can imagine this like spaghetti before and after boiling them. This step needs to take place as fast as possible to avoid liquid movements leading to unwanted losses in precision. Here it is important to ensure that both the liquid and gel form of alginate do not pose any harm to bacterial cells and that they are sustained with water and nutrients.
Step 3: Our cells are now trapped in a tangle of spaghetti. It’s time to start what they were made for: connect! Rhamnose induces the production of protein units CsgA which are exported out of the cell and self-assemble to form nanowires which connect the bacteria.


Step 4: Protein production and diffusion in the right place takes time. To create a strong interaction between cells, this step takes up to 24 hours. However, placing the biofilm into a 37 degrees incubator leads to the alginate gel drying out and eventually cell death. To prevent this, storage at room temperature was found as compromise.
Step 5: Now that a stable connection between cells has been established it is time to liberate the final product. To do so, the spaghetti tangle around the biofilm needs to go. Sodium citrate is used to complex the bridging calcium ions which then are replaced with sodium ions. Like this, the alginate is stepwise dissolved and can finally be washed away.


Step 6: But did it work? Let’s find it out by looking at the biofilm under the microscope. Certain dyes specifically interact with the bacterial nanowires created by our bacteria. These are known as a Congo Red or a Crystal Violet assay. In this manner, we can distinguish, whether the nanowires and thus our biofilm has been formed.

The Biolinker
Subtitle or summary goes here. Should be short - two or three sentences.
Initial 3D Printer ideas
First version of K'NEX printer
Biolinker - Specifications
Characterization
1. Characterization of movement in xyz

Our printer is like a bike equipped with two different gear wheels to enable changes of the printing velocity. Using a camera, we recorded nine runs of the printhead along a ruler. Using this video data, the distance covered in time steps of 1.0 seconds was measured. The average distance covered in 11 seconds was 6.57 cm.

After changing the gear, the same experiment was conducted now at a lower tip velocity. Here, the average distance covered in 16 seconds amounted to 3.44 cm.

From these data, the velocity during each time interval was calculated and the velocity distribution was plotted in the following graph. The average velocity of the fast gear wheel was 0.6 cm/second.
PhotoFor the slow gear wheel, we found an average velocity of 0.21 cm/second which is approximately ⅓ of the velocity achieved by the larger wheel. From the graph we can observe that the velocity is 2±1 cm/second.
Photo2. Characterisation of the alginate line thickness

In order to be a real 3D printer following the principle of stereolithography, many layers need to be deposited on top of each other to generate the aspired structure. But can we print several layers on top of each other without great losses in precision, thus: how thick will the lines be? To answer this question, we printed lines of one, two and three layers in triplicate using our Biolinker and measured their thickness using a microscope (10x).

3. The syringe pump
Depending on the volume and supplier of your syringe of choice, the inner diameter varies strongly. This however is an important input parameter for the syringe pump to control the rate of bioink extrusion to a constant flow rate. The inner diameter usually can be found on the supplier’s webpage. We found a flow rate of 100 µL/min to be a good value to start experiments. Minor adjustments might be necessary depending on the exact velocity at which the tip moves across the biopaper. For our experiments, we were using a Harvard Apparatus ‘11’ Plus (70-2208) syringe pump.

Design and Integration
Engineering bacteria to form a patterned biofilm
Setting out with barely more than the idea of connecting cells to form a patterned biofilm, we had to think about how to engineer our bacteria to reach this goal in the most efficient way. As the first step, we started to think about possible designs of our biobricks.
Clearly, since CsgA is the protein monomer for amyloid nanowires, this gene will be on our plasmid. But which promoter to use? Inducible or constitutive? A constitutive production of the protein monomers would lead to a premature formation of nanowires which could eventually lead to clumps clogging the tubes and leading to losses in precision. For this reason, we chose an inducible Rhamnose promoter. However, coming to this realization we concluded that we also need a CsgA knockout strain to conduct our experiments with. Finally, for an efficient optical assay of our biofilm product we decided to incorporate fluorescence in the form of GFP or RFP inside of our cells.

However, next to the protein creating the nanowires, many others exist which are important: CsgB is a membrane protein which functions as the anchor on the cell and triggers the aggregation process of CsgA to a nanowire. Presumably, depending on the level of expression of these membrane proteins we can influence the amount of connections per cell. In this manner, we imagined to manipulate biofilm strengths according to the situation at hand. In order to investigate this effect, we designed the biobrick containing CsgB with a constitutive Anderson promoter of low, medium and high inducer strength. Since we wanted to investigate the interactions between CsgA and different levels of CsgB, we designed this biobrick in the pSB4K5 backbone to avoid problems with incompatibility groups. The proteins CsgC, CsgE, CsgF and CsgG are involved in the maturation, correct folding and export of CsgA. For this reason we imagined overexpression of these proteins to have a positive effect on the total extracellular amount of available, functional CsgA. By increasing this amount, we hoped to increase the rate of biofilm formation.

Using amyloid nanowires to connect the cells, the question arises how long these nanowires can grow. Unfortunately, no exact number can be assigned to usual length of these nanowires. While their thickness has been characterized to be 100 to 350 nm, their length is of several micrometers (Pitkänen, M., et al., 2010). From this data, we created a model using the measures of a bacterial cell and different cell densities (OD600) to calculate the mean distance between each cell either head on or sideways (since E.coli has a worm-like appearance) assuming homogeneous orientation. From this, different required cell densities can be derived depending on the level of crosslinking desired. Two cutoff lines of 10 µm and 5 µm distance are plotted for easy orientation.

Corresponding to this, molecular sizes of the CsgA protein monomer were used to calculate the amount of protein monomers required for connecting two cells at a certain density. This can be used as an orientation for the time it takes to crosslink two cells assuming constant protein production and no differences by diffusion.

DIY Manuals
Build your own Biolinker and prepare all necessary materials and solutions for printing
In this section we will show you how easy and fast it is to build your own Biolinker from toy sets. We prepared a manual that everyone can use as a guideline to build a 3D printer at home. Next, we detail how you can prepare all the necessary materials and solutions before starting to print. Finally it all comes together in a video highlighting all important steps in the printing process. To make things even more easy we detail a bill of all the materials necessary to make your own 3D printed biofilm.
Build your own Biolinker
Preparing materials and solutions
1. 100 mL of sodium alginate stock for bioink
Stirr 1 g of sodium alginate in 100 mL of sterile Milli-Q in an autoclaved 400 mL bottle over 5 hours at 50 degrees Celsius until a homogeneous, white mixture is obtained. Place the bottle into a microwave and pasteurized by heating to boiling point for 30 seconds at 800W. Cool it down to room temperature quickly by using a water bath. Add the corresponding antibiotic required for your specific cells in the appropriate amount and keep the bioink in the fridge until usage.
Grow your cells overnight in LB+antibiotic. If you intend to connect the cells with CsgA nanowires: please look at our model here to identify the required OD600 of your bioink.
To print without crosslinking: Spin down the cells of a 5 mL bacterial over night culture, resuspend the pellet in 100 µL of sterile LB and mix with 900 µL of previously prepared pasteurized sodium alginate by pipetting up and down and final vortexing.
1 mL of bioink can be used to print medium sized patterns on three agar plates.
Note: the solutions 2,3,4 need to be autoclaved, this can be done together
2. Sterile CaCl2 (0.1M)
Dissolve 1.11 g of calcium chloride (anhydrous) or 1.47 g (dihydrate) in 100 mL Milli-Q and autoclave the obtained solution.
3. Sterile sodium citrate (0.1M)
Dissolve 2.14 g of sodium citrate (monobasic) or 2.94 g sodium citrate dihydrate in 100 mL Milli-Q and autoclave the obtained solution.
4. LB agar plates as print surface
Dissolve 14.24 g LB agar (obtained from Sigma Aldrich) in 400 mL Milli-Q water. Autoclave.
Reheat the autoclaved LB agar in the microwave carefully until boiling point, cool down until you can hold it with your hands and add the antibiotic matching the resistance of your cells in the required amount. Make plates under sterile conditions using roughly 10 to 20 mL. Store them in the fridge upside down until usage.
Before printing, plate 500 µL of calcium chloride (0.1M) on the LB agar plate using standard plating technique to enable formation of a hydrogel. If further cell growth is desired, keep the plates at room temperature. At 37 degrees the alginate dries out within 24 hours.
Video Tutorial
Bill of Materials
Protocols
Subtitle or summary goes here. Should be short - two or three sentences.
Lorem ipsum dolor sit amet, consectetur adipiscing elit. Praesent ultrices tincidunt ipsum, vitae tempor nibh porta ac. Fusce consectetur neque et dolor vestibulum iaculis. Nunc pretium turpis at arcu tempus vehicula. Nam nec accumsan metus, ac tempus tortor. Aenean euismod elit vitae ex ultrices pulvinar. Etiam rhoncus non urna vel volutpat. Donec ut erat ornare, faucibus quam a, posuere urna. Phasellus at nisl sed erat ultricies commodo vel ut mauris. Morbi ac mauris dui. Cras sit amet ornare nisl. Suspendisse lectus mi, ullamcorper et dolor a, vulputate condimentum velit. Morbi dolor eros, cursus euismod magna sit amet, tempus volutpat quam. Morbi at est sed erat efficitur lobortis nec non elit. Integer urna nisi, dapibus nec magna non, pharetra sodales felis. Fusce dignissim elit sit amet purus aliquet, quis luctus tortor commodo. Donec viverra enim vel ultrices iaculis.