Difference between revisions of "Team:Cambridge-JIC/Webshell"
KaterinaMN (Talk | contribs) |
KaterinaMN (Talk | contribs) |
||
| Line 42: | Line 42: | ||
<h3>Functionality of the WebShell</h3> | <h3>Functionality of the WebShell</h3> | ||
<dl> | <dl> | ||
| − | <dt><p>Live stream window</p></dt> | + | <dt><p><b>Live stream window<b></p></dt> |
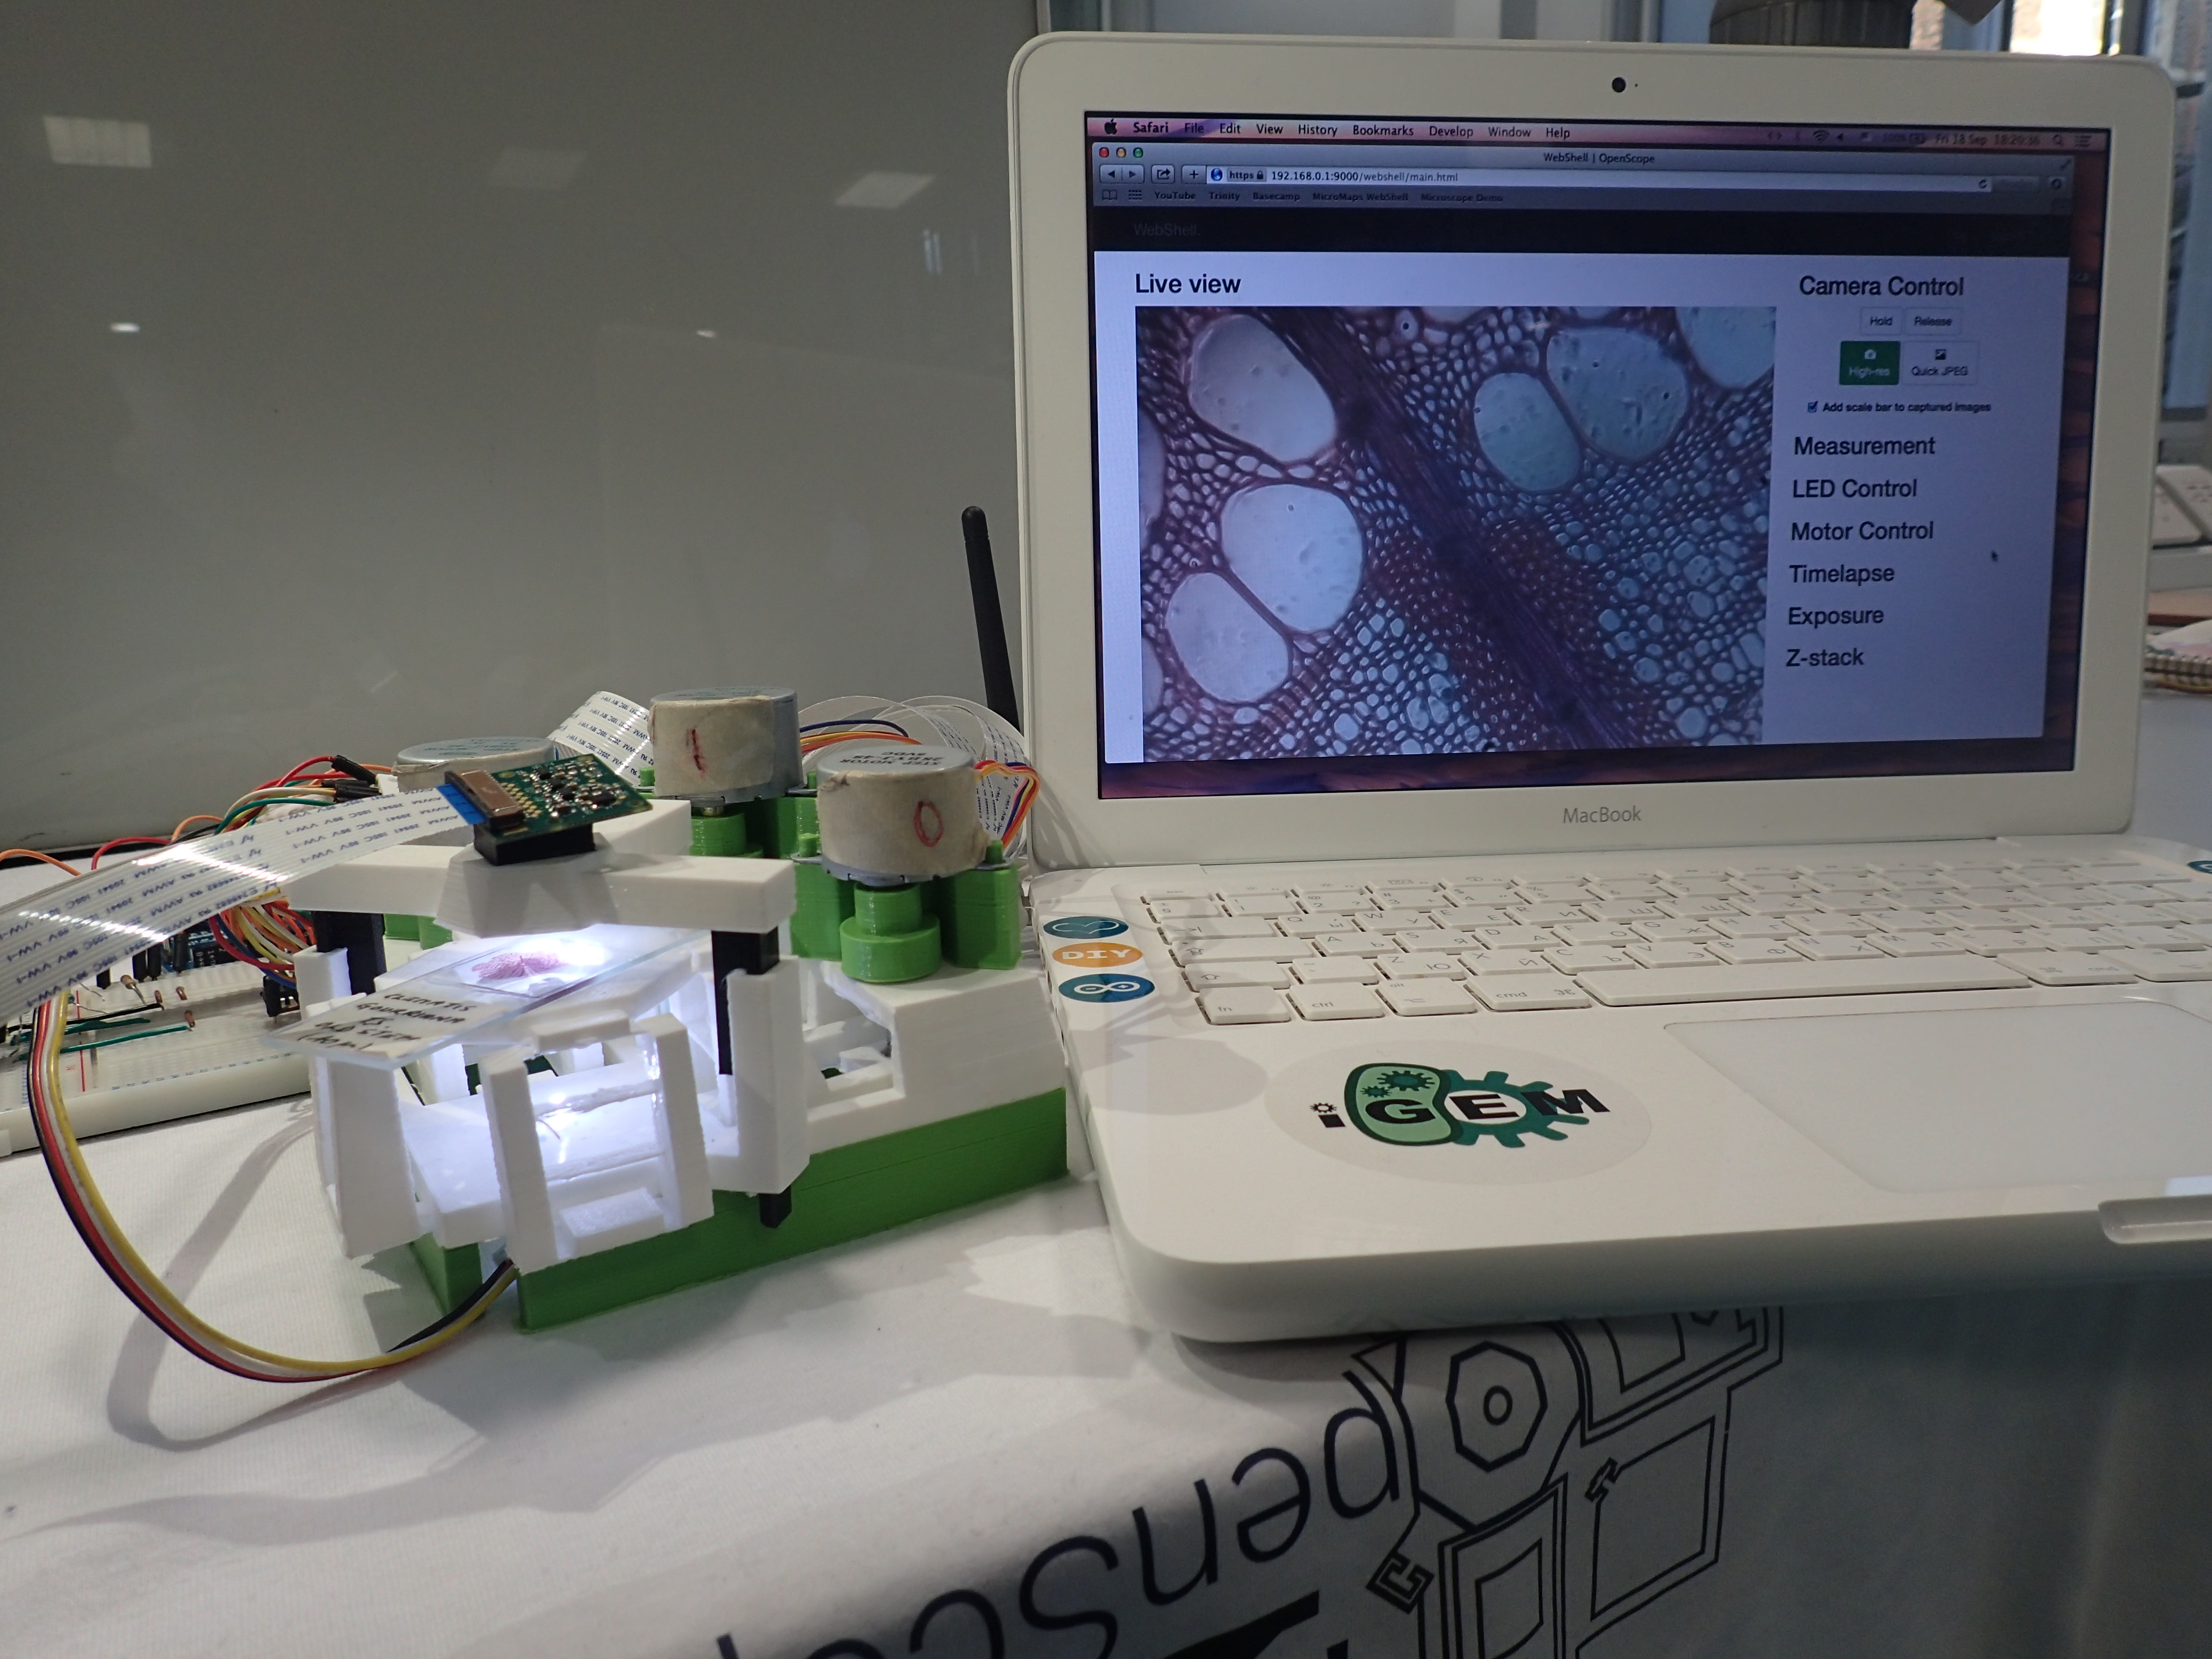
<dd><p>The user sees the live stream from the OpenScope Raspberry Pi Camera.</p></dd> | <dd><p>The user sees the live stream from the OpenScope Raspberry Pi Camera.</p></dd> | ||
| − | <dt><p>Camera controls</p></dt> | + | <dt><p><b>Camera controls<b></p></dt> |
| − | <dd><p>Hold and Release: these buttons start/stop the streamer process. Press these if you accidentally unplug the Raspberry Pi camera during use, to refresh the stream. Also come useful if another program needs access to the camera.</p></dd> | + | <dd><p>Hold and Release: these buttons start/stop the streamer process. Press these if you accidentally unplug the Raspberry Pi camera during use, to refresh the stream. Also come useful if another program needs access to the camera (these only stop the stream, but do not interrupt the entire OpenScope server).</p></dd> |
| − | <dd><p>High-Res: this button interrupts the stream to capture a 3MP png image</p></dd> | + | <dd><p>High-Res: this button interrupts the stream to capture a 3MP png image.</p></dd> |
| − | <dd><p>Quick JPEG: captures a snapshot directly from the stream (in jpg format, with lower resolution) - the advantage of this command is that it responds faster that the High-Res capture, and the image is exactly as viewed in the streamer | + | <dd><p>Quick JPEG: captures a snapshot directly from the stream (in jpg format, with lower resolution) - the advantage of this command is that it responds faster that the High-Res capture, and the image is exactly as viewed in the streamer. |
<dd><p><i>(Note: High resolution pictures sometimes appear differently coloured in comparison to the picture in the stream. This is due to camera white balance adaptation settings.)</i></p></dd> | <dd><p><i>(Note: High resolution pictures sometimes appear differently coloured in comparison to the picture in the stream. This is due to camera white balance adaptation settings.)</i></p></dd> | ||
| − | <dt><p> | + | <dd><p>Add Scalebar: tick the box if you want a scale bar added to your image. It will be automatically positioned in the bottom left corner. In order to get exact scale bars, calibrate first (see below).</p></dd> |
| − | <dd><p> | + | <dt><p><b>Measurement window<b></p></dt> |
| + | <dd><p>Calibrate: drag and draw a line of known length in the stream window (use a micrometer slide, for example) and input the length. Now you can add accurate scale bars to your images. If you do not calibrate, a default scale bar will be used.</p></dd> | ||
| + | <dd><p>Measure: directly on the live stream window, or on your last captured image</p></dd> | ||
| + | <dd><p>Clear: clears the measurements and the calibration settings (you know, when something goes quite wrong...)</p></bb> | ||
| + | <dt><p><b>LED controls</b></p></dt> | ||
| + | <dd><p>Switch between brightfield and fluorescence, turn the lights off, or simply toggle between the options. Tip: pressing Z also works</p></dd> | ||
| + | <dt><p><b>Motor controls</b></p></dt> | ||
</dl> | </dl> | ||
Revision as of 18:04, 18 September 2015
WebShell
Webshell provides a basic interface to use the OpenScope. The difference to standard microscopy software? It is web based - can be accessed by multiple people at once and remotely.