Difference between revisions of "Team:Cambridge-JIC/ImageJ"
KaterinaMN (Talk | contribs) |
KaterinaMN (Talk | contribs) |
||
| Line 22: | Line 22: | ||
<p>Now you will not need to do that again. You can start up the main control panel by going to Plugins > openscope > Start Connection. You will get a control panel to control the LEDs and motors of the OpenScope.</p> | <p>Now you will not need to do that again. You can start up the main control panel by going to Plugins > openscope > Start Connection. You will get a control panel to control the LEDs and motors of the OpenScope.</p> | ||
<center><img src="https://static.igem.org/mediawiki/2015/5/5d/CamJIC-ImageJ-3.png" style="width:400px"></center> | <center><img src="https://static.igem.org/mediawiki/2015/5/5d/CamJIC-ImageJ-3.png" style="width:400px"></center> | ||
| − | <p>By opening Live View, be prepared to become immersed in a live stream of the microscope just like in <a href="//2015.igem.org/Team:Cambridge-JIC/Webshell" class="blue">WebShell</a>. Directly from ImageJ. | + | <p>By opening Live View, be prepared to become immersed in a live stream of the microscope just like in <a href="//2015.igem.org/Team:Cambridge-JIC/Webshell" class="blue">WebShell</a>. Directly from ImageJ.</p> |
| + | <center><img src="//2015.igem.org/wiki/images/6/63/CamJIC-ImageJ-4.png" style="width:400px"></center> | ||
| + | <p>You can still use keyboard controls (same as in <a href="//2015.igem.org/Team:Cambridge-JIC/Webshell" class="blue">WebShell</a>) to control the motors and LEDs inside the control panel or in the live view.</p> | ||
| + | <p>This interface also allows for capturing images directly from the microscope and importing them straight into ImageJ with the click of a button.</p> | ||
| + | <center><img src="//2015.igem.org/wiki/images/0/04/CamJIC-ImageJ-5.png" style="width:400px"></center> | ||
| + | <p>Now you can use your other favourite ImageJ plugins to perform image analysis on your captured images. Of course, you can import previously taken images by visiting the gallery and right clicking to save them to disk and import them manually into ImageJ.</p> | ||
</div></div></section> | </div></div></section> | ||
| − | |||
| − | |||
| − | |||
| − | |||
| − | |||
| − | |||
| − | |||
| − | |||
| − | |||
| − | |||
| − | |||
| − | |||
| − | |||
| − | |||
| − | |||
| − | |||
| − | |||
| − | |||
| − | |||
| − | |||
| − | |||
| − | |||
| − | |||
| − | |||
</html> | </html> | ||
{{:Team:Cambridge-JIC/Templates/Footer}} | {{:Team:Cambridge-JIC/Templates/Footer}} | ||
Revision as of 22:53, 18 September 2015
Instructions
Download and unzip the file above into your ImageJ plugins folder. You should see a folder called OpenScope within the Plugins folder after this. Then restart ImageJ if it was open or start it up. You should see an entry "OpenScope" under the Plugins menu now.

Then click Plugins > OpenScope > Connection Settings and enter in the ip address of OpenScope (If you are connected to the OPENSCOPE wifi network, this is 192.168.0.1) and your username and password. (By default, username is admin and password is test).

Now you will not need to do that again. You can start up the main control panel by going to Plugins > openscope > Start Connection. You will get a control panel to control the LEDs and motors of the OpenScope.

By opening Live View, be prepared to become immersed in a live stream of the microscope just like in WebShell. Directly from ImageJ.
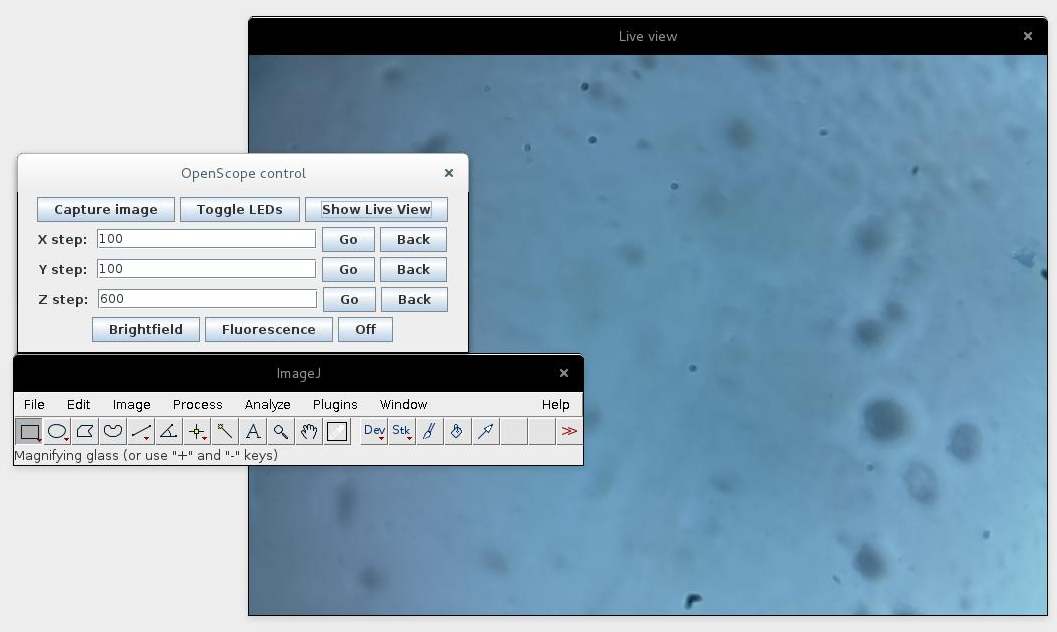
You can still use keyboard controls (same as in WebShell) to control the motors and LEDs inside the control panel or in the live view.
This interface also allows for capturing images directly from the microscope and importing them straight into ImageJ with the click of a button.
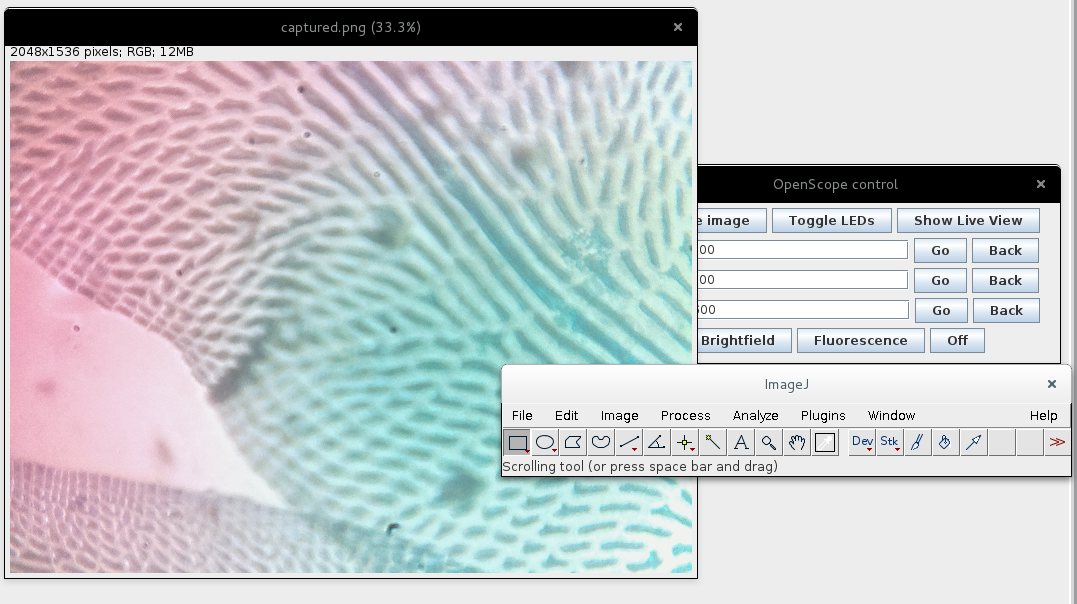
Now you can use your other favourite ImageJ plugins to perform image analysis on your captured images. Of course, you can import previously taken images by visiting the gallery and right clicking to save them to disk and import them manually into ImageJ.