Team:Carnegie Mellon/MakerMovement
Maker Movement.
The movement of makers. The maker movement.
To exemplify the power of the Maker Movement and its capabilities, we printed a 3D model of the Fort Pitt bridge, one of the iconic bridges of Pittsburgh, Pennsylvania, and used it to house luminescent Luciferase. We designed our model using SolidWorks and Meshmixer, making sure to keep the parts saved as separate pieces. We used an Assembly file (.SLDASM) to compile the different parts and see what the final bridge would look like. Seen below is the SolidWorks rendering of our completed 3D model:

After we had a complete model, we had to order the filament that our bridge would be made of. We chose PLA for all parts of it, using three different colors; Honeycomb Drone Yellow, Honeycomb Drone Black, and Taulman 3D t-glase. The roads were made of black, the iGEM lettering of t-glase, and the rest made of yellow filament. Once we had our filament, we were ready to start printing, which we did at the Techshop (techshop.ws) using a Printrbot. Before printing the final pieces we had to refine the settings for maximum stability and detail. We created a few prototypes in order to test these settings, which are seen below.

Finally, after we had the settings adjusted correctly, we got to printing out the pieces. This proved to be a fairly easy process, although we ran into problems along the way like the machines getting jammed and the prints stopping halfway through, meaning that a complete restart was necessary. Seen below are various photos and videos taken during the printing process. Although we had to change some settings depending on the intricacy of the current part, most were around 20-25% Infill, 0.2mm layer height, 0.8mm outer shell, print speed 20, flow 100. I also included a raft support on the particularly detail oriented parts like the roof and the iGEM lettering in order to get better adhesion in the first few layers.


Once we had all of our printed pieces, we sanded them in order to get smooth edges on the parts. We then assembled them with superglue (Except for the reservoir that sits below the bridge, which was left unattached. Easy access to said reservoir is very important as it is important to avoid getting any bacteria on the bridge itself. The final bridge can be seen below:

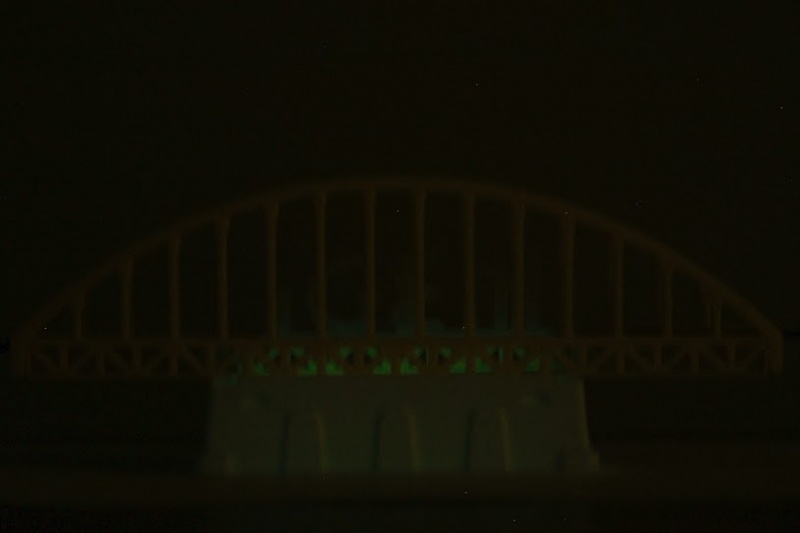
When the reservoir is filled with Luciferase culture and coelenterazine is added, the iGEM lettering will illuminate while the rest of the bridge stays darker. Seen below is our bridge with the 3D printed (in white, I bought some filament from the Techshop) 2mL reservoir, followed by another test where we used a 7mL reservoir in order to create more luminescence to boost the signal.

Below are the files for our individual parts (.SLDPRT) as well as our final assembly file (.SLDASM) of the Fort Pitt Bridge:
SOLID WORKS FILES
After we had a complete model, we had to order the filament that our bridge would be made of. We chose PLA for all parts of it, using three different colors; Honeycomb Drone Yellow, Honeycomb Drone Black, and Taulman 3D t-glase. The roads were made of black, the iGEM lettering of t-glase, and the rest made of yellow filament. Once we had our filament, we were ready to start printing, which we did at the Techshop (techshop.ws) using a Printrbot. Before printing the final pieces we had to refine the settings for maximum stability and detail. We created a few prototypes in order to test these settings, which are seen below.
Finally, after we had the settings adjusted correctly, we got to printing out the pieces. This proved to be a fairly easy process, although we ran into problems along the way like the machines getting jammed and the prints stopping halfway through, meaning that a complete restart was necessary. Seen below are various photos and videos taken during the printing process. Although we had to change some settings depending on the intricacy of the current part, most were around 20-25% Infill, 0.2mm layer height, 0.8mm outer shell, print speed 20, flow 100. I also included a raft support on the particularly detail oriented parts like the roof and the iGEM lettering in order to get better adhesion in the first few layers.
Once we had all of our printed pieces, we sanded them in order to get smooth edges on the parts. We then assembled them with superglue (Except for the reservoir that sits below the bridge, which was left unattached. Easy access to said reservoir is very important as it is important to avoid getting any bacteria on the bridge itself. The final bridge can be seen below:
When the reservoir is filled with Luciferase culture and coelenterazine is added, the iGEM lettering will illuminate while the rest of the bridge stays darker. Seen below is our bridge with the 3D printed (in white, I bought some filament from the Techshop) 2mL reservoir, followed by another test where we used a 7mL reservoir in order to create more luminescence to boost the signal.
Below are the files for our individual parts (.SLDPRT) as well as our final assembly file (.SLDASM) of the Fort Pitt Bridge:
SOLID WORKS FILES