Team:Freiburg/Project/System


The DiaCHIP: Overview
On this page they need to learn about our DiaCHIP, at least enough to understand our results and be impressed. They need to be informed about:
- the glass slide / silicone sandwich (image + text)
- general workflow of the system
-> that we're working with epitopes of viruses/bacteria
- the basics of iRIf
- the "lets switch perspective" part of the presentation / the basics to understand the circles of the slide images used in the results section
try to think of how we explain the DiaCHIP in our presentation
RJ und JD kümmern sich drum
The DiaCHIP is an innovative tool to screen for a broad range of antibodies present in blood serum. Antibodies can be an indicator for an immune response against an infection or a successful vaccination. Especially the ability to differentiate between life threatening diseases and mild infections within a short time bears the potential to save lives. The DiaCHIP makes it possible to screen for multiple specific antibodies simply using a drop of blood.

The aim of our DiaCHIP is to screen simultaneously for hundreds of different infectious diseases. We based our system on antigens derived from viruses and bacteria (figure 1). If you are getting in contact with one of these diseases your immune system is producing antibodies. They are binding to the corresponding antigen. This binding event can be detected with our system. Our approach is based on two components. A silicone slide were the DNA, coding for a distinct antigenic peptide, is immobilized. The second component is a glass slide with a specific surface for the binding of the expressed antigens. Both are the size of a microscopy slide and form a microfluidic chamber. By adding blood of a patient, antibodies that might be present in the sample (due to a disease) bind to the antigens.
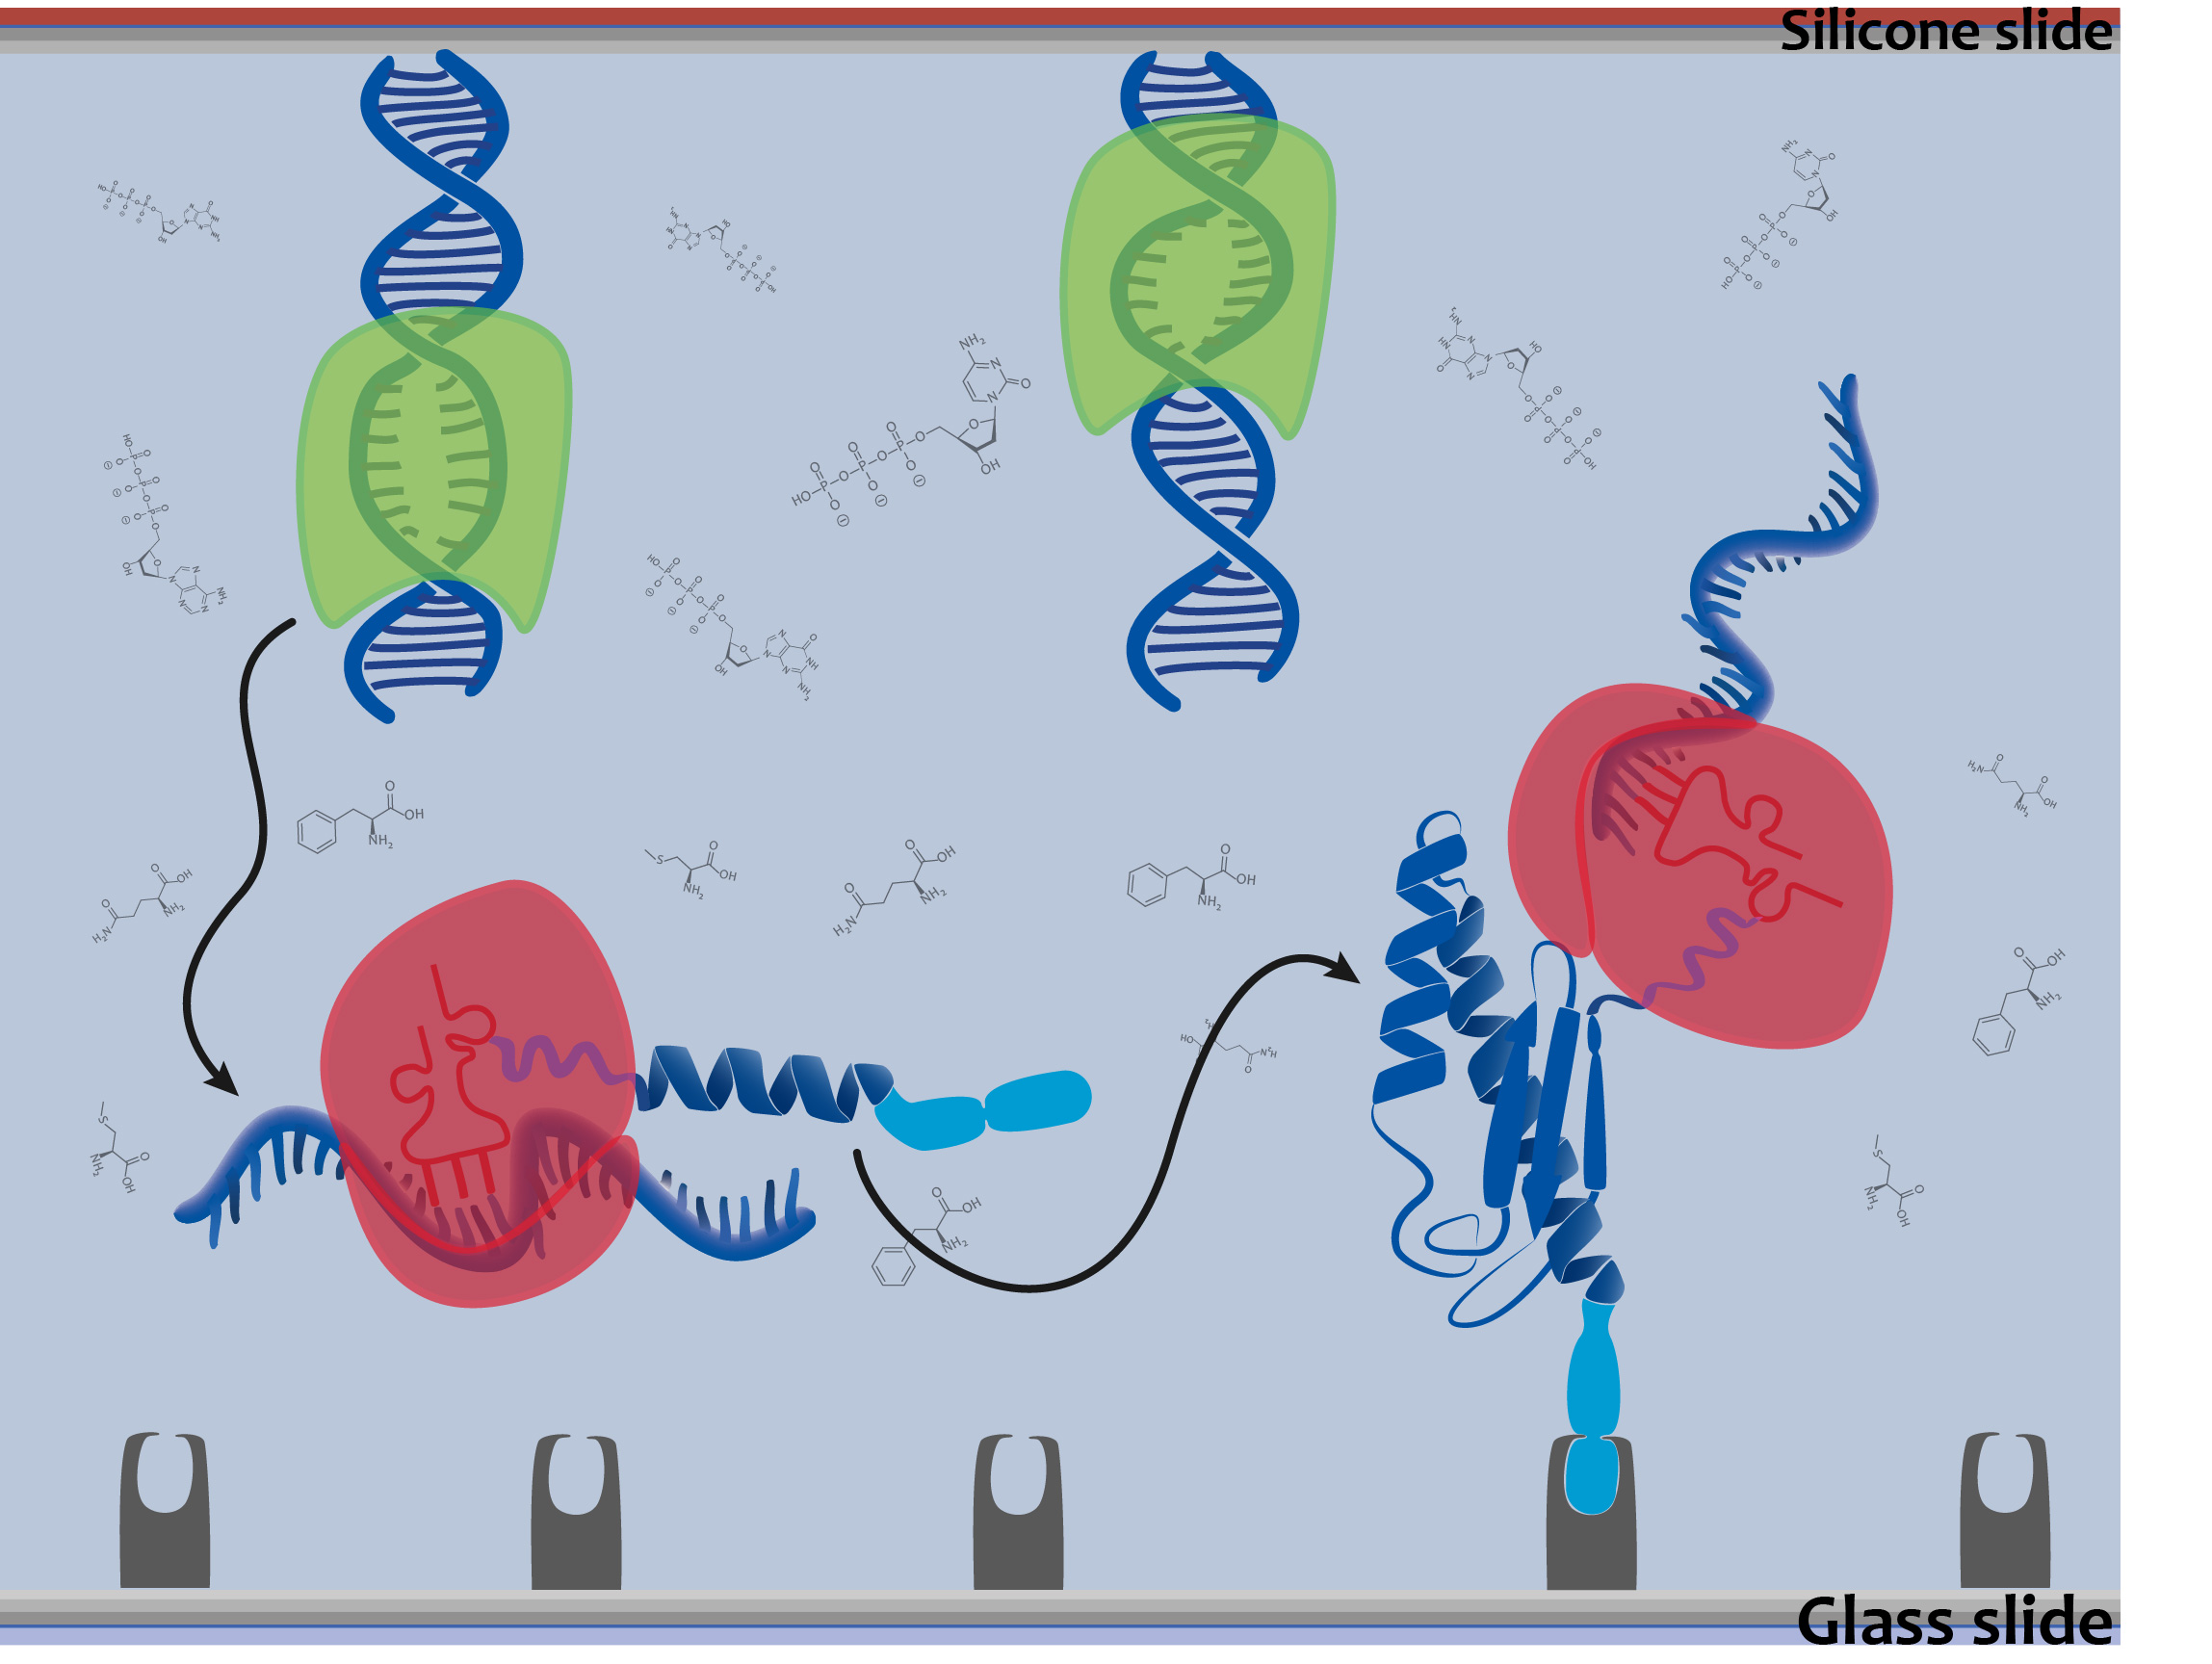
We achieved the expression of our antigens directly from DNA arrays this is why our system is made up of 2 slides (figure 2). This expression system based on a bacterial lysate makes the need for genetically engineered organisms to produce each single antigen redundant. Therefore protein arrays can be produced on demand by adding our cell-free expression mix.

After the cell-free expression not only our desired antigens are present within the chamber, but also all other components of the cell-free mix (figure 3). All these proteins would bind unspecifically, disturbing the binding of the antigens. Therefore, we designed our DNA constructs in a way that each antigen can easily be fused to tags that can bind to a specific surface. The specific surface is established by ourselves.

After preparation of the DiaCHIP, a patient’s serum sample can be flushed over the protein array. The binding of antibodies to the protein surface causes a minimal change in the thickness of the layer on the slide right at the corresponding antigen spot. This change can be measured without the need for a further label with an emerging method called iRIf (imaging Reflectometric Interference). Based on the interference of light beams reflected on different medium borders, binding events can be recorded in real-time.

To give you a visual impression of how such a measurement looks like we switch perspectives and look at the chip from the top (figure 6). In all our actual measurement you will have this perspective.
After weeks of optimizing the different components of the DiaCHIP, we are proud to present our results. We reached the highlight of our project with the successful detection of antibodies in our own blood!


