Team:UCLA/Notebook/Honeybee Silk/26 May 2015
Contents
PCR of Honeybee G-Block
- Diagnostic PCR, will be running a temperature gradient
- From the NEB Calculator, I found the TM Melting temperature to be 67C. I will also run two samples at 64 C and 70C, then compare on a gel.
- Cloning AmelF3 to prepare for insertion into pET24a expression vector
- Primers 10 and 11
- See Benchling for reference
| Component | Volume (out of 25uL) |
|---|---|
| 5X Q5 Reaction Buffer | 5uL |
| 10mM dNTPS | 0.5uL |
| 10mM primer 10 | 1.25uL |
| 10mM primer 11 | 1.25uL |
| Template (Honeybee G-block) | 1uL |
| Q5 High Fidelity DNA Polymerase | 0.25uL |
| Nuclease Free Water | 16.25uL |
Program
| Step | Temperature | Time |
|---|---|---|
| Initial Denaturation | 98C | 3 min |
| Cycles (x25) | 98C | 10s |
| Annealing | 64/67/70C | 20s |
| Extension | 72C | 30s |
| Final Extension | 72C | 2min |
| Hold | 12C | Hold |
Gel Visualization
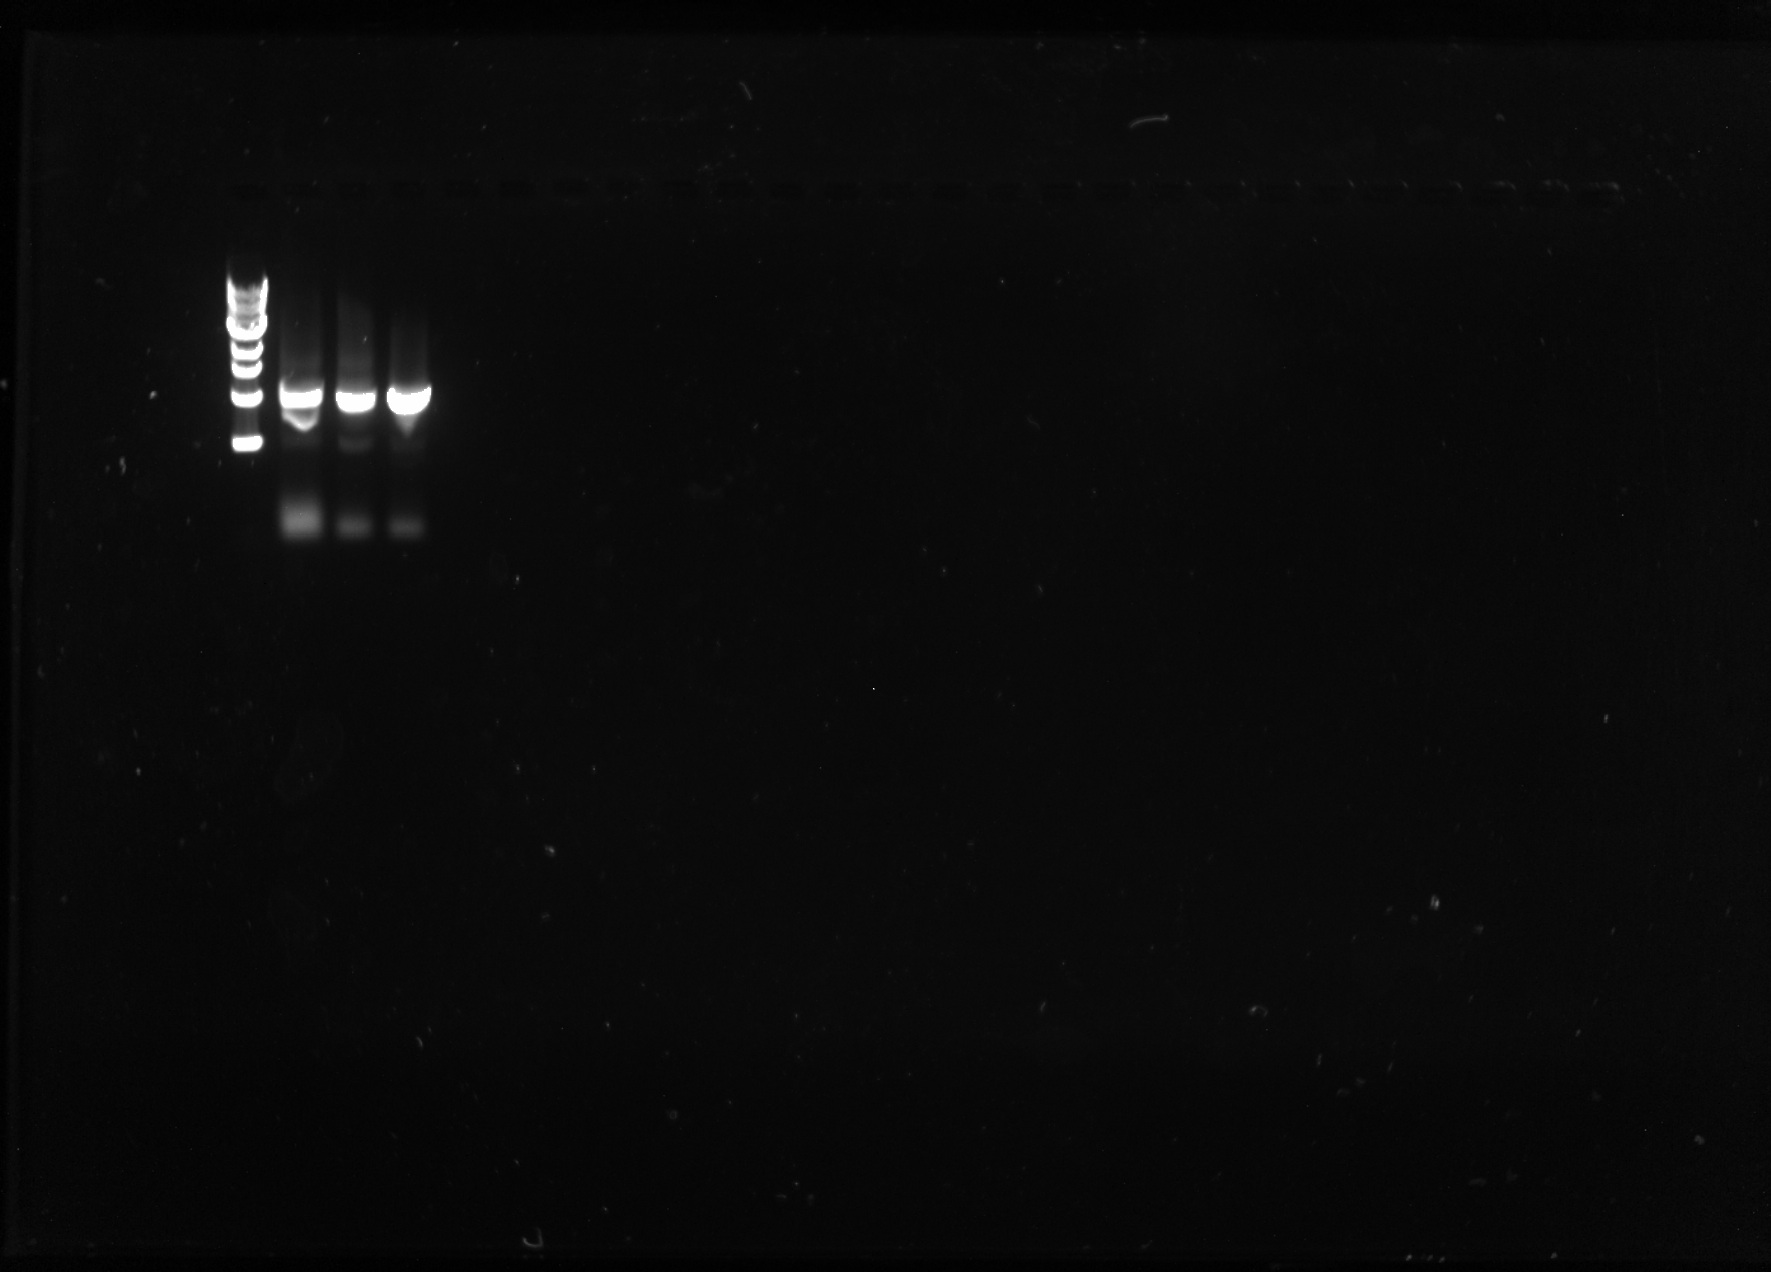
I ran all three samples on a 1% agarose gel against a 1kB ladder. Expected BP length: ~1000bp
Results: All three bands were present at the correct bp length, the cleanest band was from the 67C annealing temperature.
BugBuster Protocol
- Using the Bugbuster 10X cell lysis reagent in order to purify our honeybee silk protein via inclusion bodies.
- Based protocol off of the Novagen manufacturer's protocol which can be found [http://wolfson.huji.ac.il/purification/PDF/Protein_Expression_Extraction/NOVAGEN_BugBuster_protein_extraction.pdf here].
- Expressing honey bee silk in E. Coli, from [http://parts.igem.org/Part:BBa_K1763001 BBa_K1763001]
Step by Step Protocol
- Determine wet wet weight of cell pellet after spinning liquid culter at 10000 x g for 10 min.
- 2.5 g
- Resuspend in 5 ml/g Bug Buster (1x) by pipetting and gently vortexing.
- This is 12.5 ml in our case
- Put on shaker or rotating mixer for 15 min at RT
- Took our first fraction at this point of the full cell lysate (F1)
- Centrifuge 16000 g 20 min at 4 degrees C
- Took next fraction at this point of the supernatant, labeled (S1)
- Resuspend pellet in same volume of 1X bugbuster as before
- 12.5 ml
- Pipett up and down and vortex gently to get an even suspension.
- Took third fraction at this point (F2)
- I did not go to great lengths to get an even suspension here, but I noticed in retrospect that the protocol emphasized the importance of this in order to get pure inclusion bodies.
- Add dry lysozyme to final concentration of 200 ug / ml
- For 12.5 ml solution I added around 2.5 mg of lysozyme
- I did not add any DNAse because it was not mentioned on the manufacturer's protocol, but in the future I will try adding 1 ul of DNAse at this point because chromosomal DNA might have been a problem in subsequent steps.
- Add 6 volumes of 1:10 diluted bugbuster (.1X)
- At this point we split the solution up into two 50 ml falcon tubes and added 37.5 ml of .1X bugbuster to each tube
- Centrifuge 16000g 15 min. 4 degrees C to collect inclusion bodies.
- Remove supernatant w/ pipett, take next fraction (S3)
- After spinning this down, there was a pellet, with an opaque and viscous substance. (Im guessing it might be chromosomal DNA)
- It was difficult to remove the supernatant because the viscous liquid kept getting sucked up and bringing the pellet up with it.
- Resuspend pellet in 1/2 volume of original 0.1X bug buster solution
- 18.75 ml per tube
- Mix to get an even suspension by pipetting and vortexing for several minutes and spin down as in step 9.
- Repeat step 11-12 two more times.
- Take samples of supernatant at each wash step
- Resuspend inclusion body pellet in 3% SDS solution and incubate at 60 C in the water bath for 2 hours
- I used around 2 ml, but I probably could have used less, because the pellet dissolves well in the heat
- Store solution at 4C until further required.
- I noticed that after a day in the 4C, the solution gelled up.
- According to protocol, storage at temperatures below 4°C may cause precipitation of the detergents in BugBuster reagent. Incubate in a room temperature water bath with gentle swirling to redissolve.
Some Notes
- I collected the viscous (potential chromosomal DNA) substance and labeled it S4.
- After the second wash step, I tried to remove all of the viscous substance, after which the resulting pellets were much smaller, and difficult to break up even after several minutes of vortexing.
- Next Step is to run the different fractions, and the dissolved purified silk on an SDS gel to see if I got any protein.
Gel Image
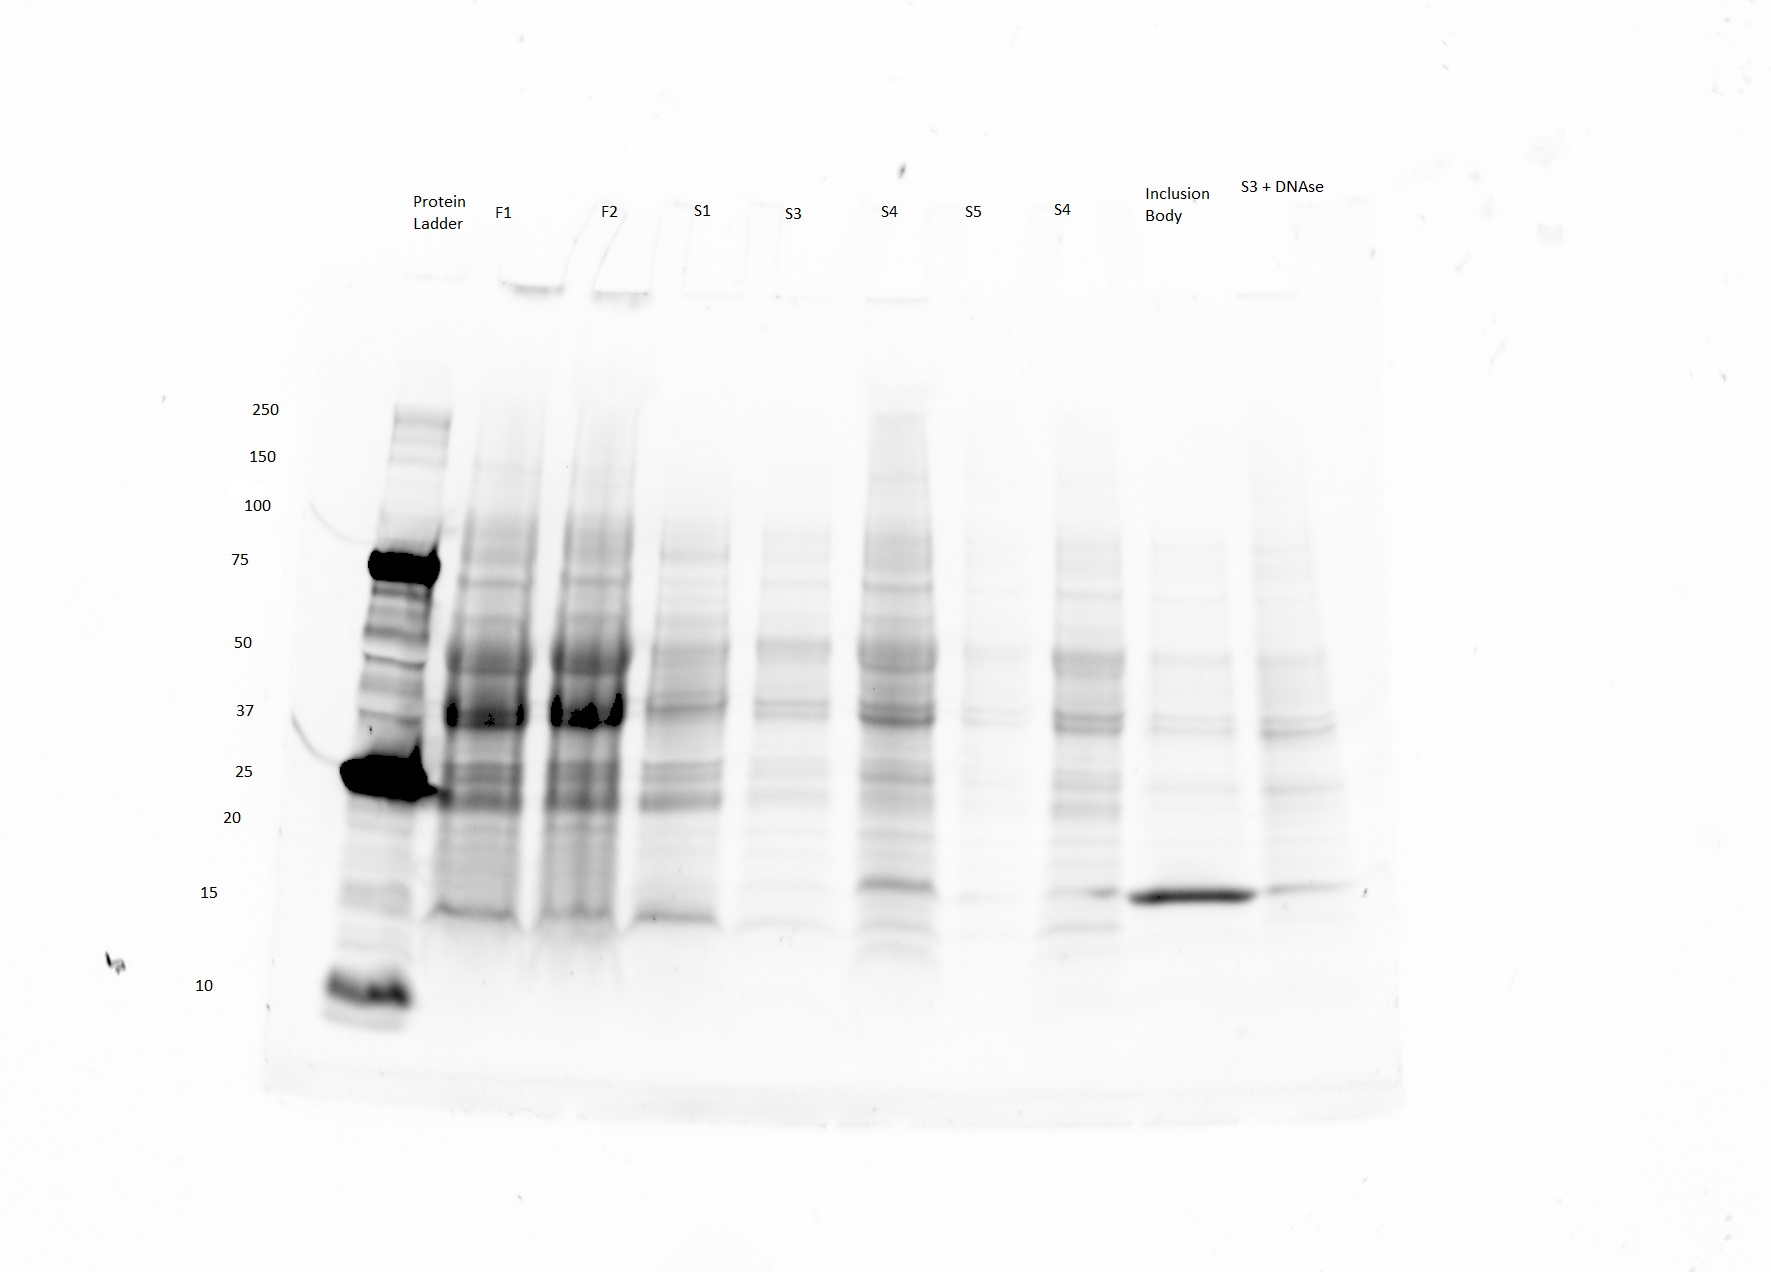
- The product was expected to be purified in the lane labeled inclusion body.
- The bright band in the inclusion body lane seems to be around 16 kDA as opposed to the expected 31.6 kD.
- Im not sure what to make of this data. Although there is a bright and somewhat isolated band, it is not the right size.
Might have something to do with the fact the that the sample was a few weeks old when it was run.
- I will try this experiment again using a T7 promoter system.

